Bad input creates weak output. If you want a face analysis report that feels sharp, specific, and worth reading, the photo matters more than most people think.
A strong image gives the engine clear facial structure, visible proportions, and stable visual signals. A weak image introduces noise - shadows, distortion, filters, extreme angles, and low resolution all make the scan work harder and read less cleanly. If your goal is better personality pattern detection, compatibility insight, or a more credible-looking report, start with the right image.
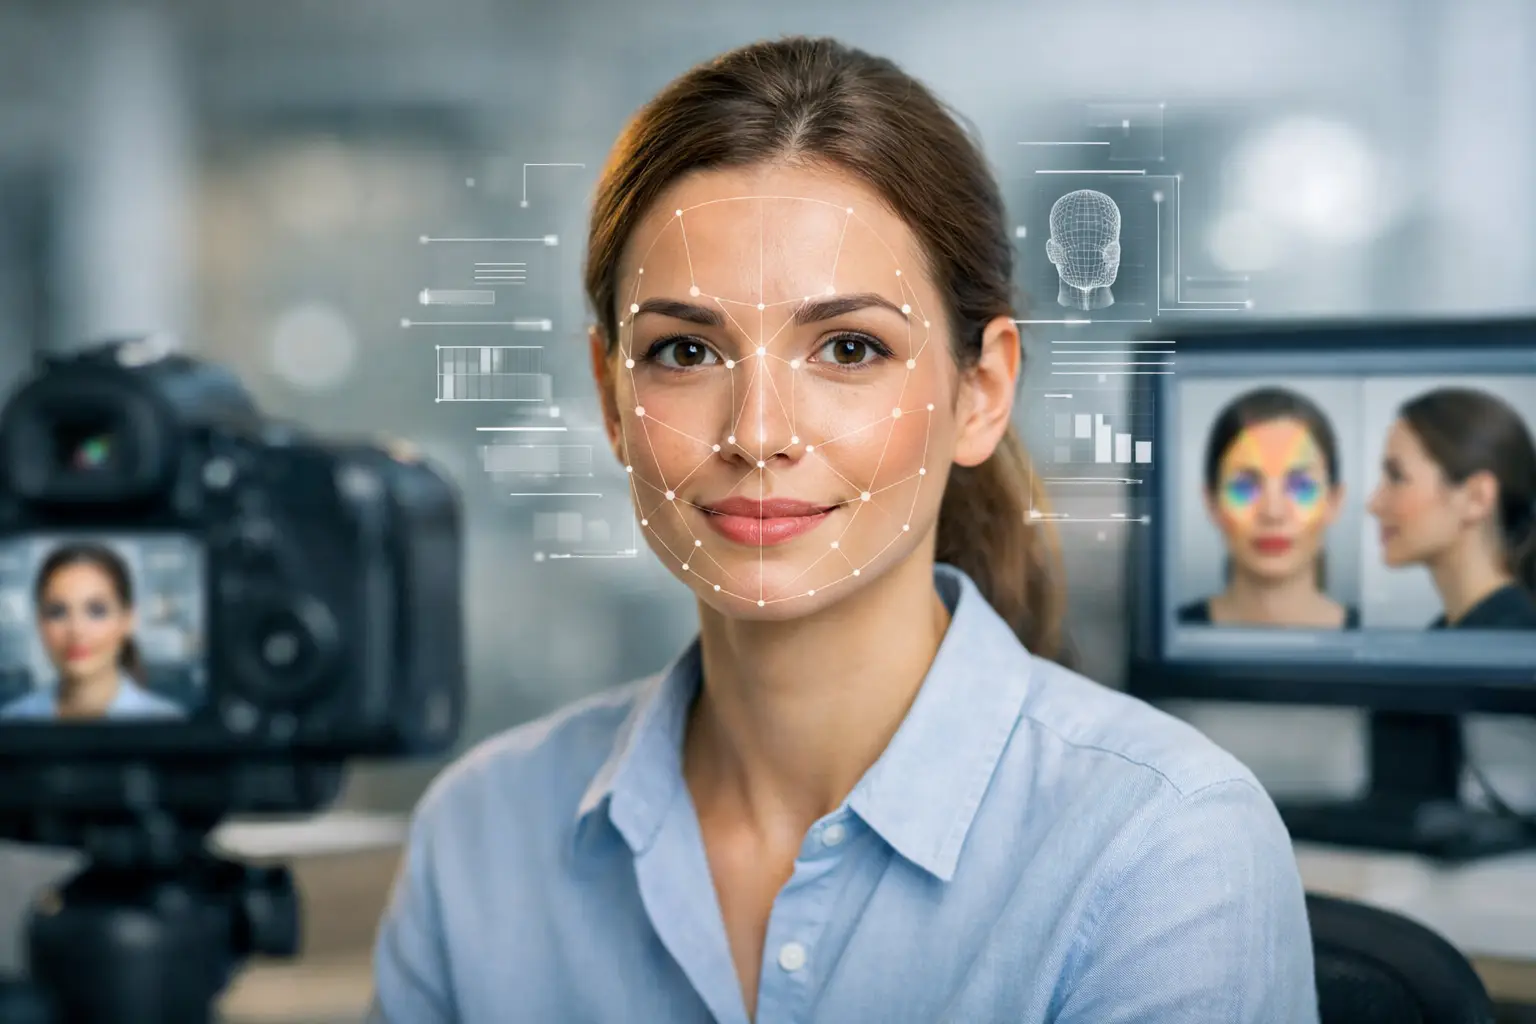
What photo works for face analysis?
The best photo for face analysis is a clear, front-facing image with even lighting, a neutral or lightly relaxed expression, no heavy filters, and enough resolution to show natural facial structure. The full face should be visible, the camera should sit close to eye level, and the image should look current rather than heavily edited or years out of date.
That is the short answer. The more useful answer is that face analysis performs best when the image shows stable features instead of temporary distractions. Bone structure, spacing, symmetry, proportion, and contour need to be visible. The more visual interference in the frame, the less confidence any system can have in what it is reading.
Why the right photo changes the report quality
Most people assume any selfie will do. That is where report quality drops.
Face analysis systems are not just looking for a face-shaped object in a frame. They are evaluating how features relate to each other. Eye spacing, jaw definition, forehead exposure, cheek contour, nose line, brow structure, and mouth shape all become part of the pattern. When lighting is uneven or the face is tilted hard to one side, those patterns can appear altered.
This is why two photos of the same person can produce very different levels of confidence. One image may show a clean structural read. Another may hide half the cheek line in shadow, stretch the nose with a wide lens, or flatten the eyes with an overhead angle. Same person, different input quality.
If you are using face analysis for self-discovery, relationship insight, or professional use such as team fit conversations, cleaner input leads to a more persuasive output. That matters when you want a report that feels coherent, not generic.
The ideal setup for a face analysis photo
A usable photo does not need studio equipment. It does need control.
Face the camera straight on
Front-facing photos usually perform best because they show the full geometry of the face. A slight natural turn is fine, but a dramatic profile or high-angle selfie removes too much structural information.
If the platform supports profile reading as part of its workflow, that is different. But for a core scan, your safest choice is a straight, balanced head position with both sides of the face visible.
Use soft, even lighting
Natural daylight near a window is usually the strongest option. The light should fall evenly across the face, not blast one side and darken the other.
Harsh overhead lighting creates shadows under the eyes and nose. Backlighting turns the face into a low-detail silhouette. Colored LED lighting may look stylish, but it changes skin tone, edge definition, and contrast. For analysis, clean beats dramatic every time.
Keep the expression calm
A slight natural smile is fine. A huge grin, duck face, exaggerated surprise, or tense expression is less useful.
Why? Because expression changes facial lines and temporarily shifts the proportions of the mouth, cheeks, eyes, and jaw area. If the purpose is reading deeper pattern architecture rather than a passing mood, the face should look relaxed and stable.
Show the full face clearly
Hair can stay natural, but it should not hide major facial zones. Avoid sunglasses, hats that cast shadows, hands on the face, or anything that blocks the brow, eyes, nose, or jawline.
A face analysis engine needs visibility. If key regions are hidden, the scan may still run, but the reading will rest on less complete visual data.
Choose a high-resolution image
Blurry images are one of the fastest ways to weaken a result. If the system cannot distinguish clear edges and feature boundaries, structural mapping becomes less precise.
You do not need a professional camera. Most recent smartphones are more than capable. Just avoid screenshots, heavily compressed social images, and photos cropped from a group shot.
What photo works for face analysis if you only have selfies?
A selfie can work well if it is taken correctly. The problem is not the selfie itself. The problem is how selfies are usually taken.
Many selfies are shot from too close, from above, in dim indoor light, with a beauty filter on, and with the head tilted. That combination distorts the face. Features closer to the lens can appear larger, and the lower part of the face can narrow or widen unnaturally depending on angle.
If you are taking a selfie for analysis, hold the camera at eye level, step back slightly, use good daylight, and keep the lens clean. Better yet, use the rear camera with a timer or have someone else take the photo. Less lens distortion usually means a stronger scan.
Photos that usually reduce scan quality
Some images look great on social media and still perform poorly for analysis.
Filters are a major issue because they smooth skin, reshape contours, enlarge eyes, slim noses, and alter contrast. That may improve aesthetics for posting, but it weakens authenticity for facial reading.
Group photos are another poor choice, even if cropped later. Cropping often lowers resolution, and the face may have been captured off-angle or mid-expression.
Old photos can also create mismatch. If your face has changed meaningfully through age, weight shift, facial hair, cosmetic work, or lifestyle changes, an outdated image may not reflect your current presentation.
Very stylized portraits can be tricky too. Strong makeup contouring, dramatic side light, black-and-white filters, and editorial retouching can all interfere with natural structure visibility. These images are visually impressive, but analysis works best on reality, not styling.
What photo works for face analysis in professional use?
If you are scanning a colleague, candidate, client, or team member with permission, use a photo that looks neutral, current, and business-clean. Think less branding portrait, more clear identity image.
That means no event photos, no heavy expression, no head tilt, and no aggressive editing. The most reliable professional image often looks similar to a strong ID or onboarding portrait, except with softer lighting and better resolution.
This matters because professional users are usually looking for fast personality signals they can discuss, compare, or include in a structured workflow. When the photo is clear, the resulting report feels more credible in that setting.
Small details that make a bigger difference than expected
Glasses can be fine if they do not create glare across the eyes. Facial hair is also fine if it is current and clearly visible. The issue is not whether these details exist. The issue is whether they hide structure.
Makeup is similar. Normal makeup usually does not cause a problem. Heavy contouring that visually reshapes cheekbones, nose width, or jawline can. If the goal is a clean read of facial architecture, less alteration is usually better.
Background also matters, but less than people think. A plain background helps because it keeps contrast and focus clean. Still, background is secondary. Lighting, angle, and clarity carry more weight.
A practical standard to follow before you upload
Before you submit a photo, ask four quick questions. Can I see both eyes clearly? Is the face evenly lit? Does this image look like my real face today? Is anything altering or hiding my natural structure?
If the answer is yes to the first three and no to the last, you are probably using the right image.
For users who want the strongest possible result, a guided platform helps reduce guesswork. SomaScan.ai, for example, is built around a structured scan flow so users can move from image input to report output without needing technical expertise. That only works well, though, when the source photo is strong.
FAQ: what photo works for face analysis?
Can I use a smiling photo?
Yes, if the smile is light and natural. A huge expression can shift feature balance and reduce structural clarity.
Is a side profile okay?
Usually not as your main image unless the workflow specifically asks for profile analysis. Front-facing is the safer default.
Do I need professional photography?
No. A modern phone photo in good daylight is usually enough if it is sharp, straight, and unfiltered.
Are filters ever okay?
Not if you want the cleanest read. Even subtle beauty filters can reshape important facial details.
The best face analysis starts before the scan begins. Choose a photo that shows your real structure clearly, and the report has a far better chance of feeling precise, confident, and genuinely useful.